
Getting started · Users and permissions
Add users and give them a role
Add a staff member who can log in, set their password, department and designation, and give them a role.
Each person who works in the software should have their own user. What a user can open depends on the role you give them.
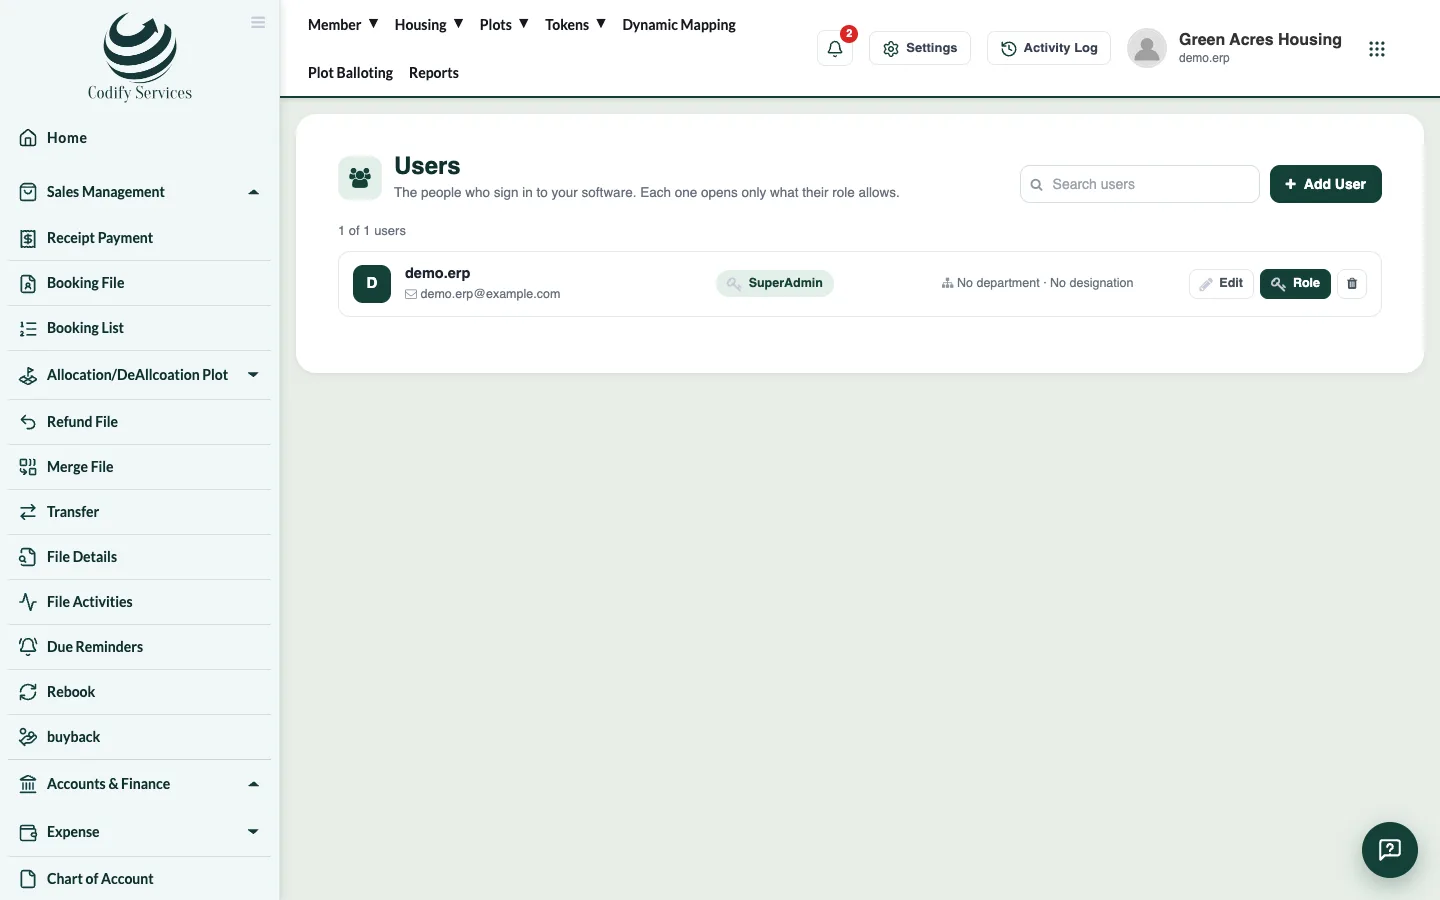
Before you start
- Make the roles you need first (see Create roles and choose their permissions). Department and designation are optional.
Steps
- Press Settings (the gear) at the top right.
- Under Users & Roles, press Users.
- Press Add User.
- Enter the User name, Email and Password.
- Choose a Department and Designation if you use them.
- Press Add user.
- In the list, press Role on the new user (or No role yet · Give a role).
- Tick the role and press Save role.
Change or remove a user
- Edit: change the user name, email, department or designation. To set a new password, type it in New password; leave it blank to keep the current one.
- The bin icon deletes the user.
Good to know
- Your role needs the permissions for users (ask your administrator, or check Role Claims > User & Roles).
- A user sees new permissions after they log out and log in again.
- Use a real email for each user: it is needed to reset a forgotten password.
- If your company has more than one society, the User Society page (address #/Home/settings/usersociety) chooses which societies each user can open: pick the user, tick the societies and press Assign Society.
Related
More in Users and permissions
Create roles and choose their permissionsA role is a set of permissions. Make roles such as Accountant or Cashier and tick exactly what each one may open and do.See who did what with the Activity LogThe Activity Log lists every action in the software with the user, page, time and result, so you can check who changed what.