
Accounts & Finance · Set up
Work with the chart of accounts
See all your accounts as a tree, add accounts and sub-accounts, edit or deactivate them, and print the chart of accounts.
The chart of accounts is the list of every account you post to: assets, liabilities, equity, income and expenses. It is shown as a tree, each account under its parent.
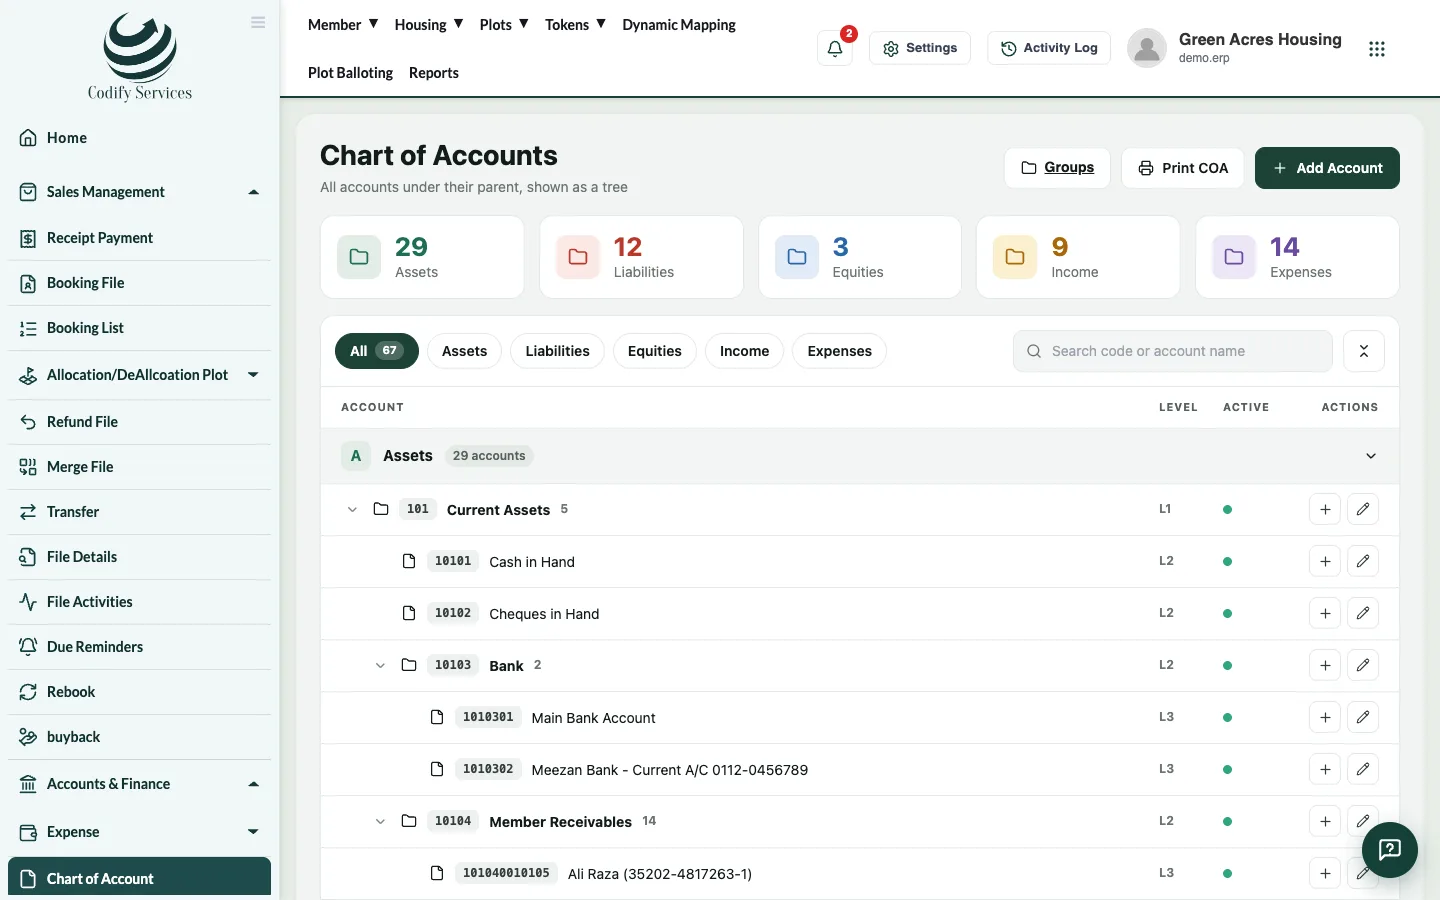
Steps: add an account
- In the sidebar, open Accounts & Finance > Chart of Account.
- Press Add Account (or select a parent account and press Add Sub-account).
- Choose the Parent Account, enter the Account ID and Account Name, and tick Is Active.
- Save.
Steps: change an account
- Click the account in the tree. Its details open on the side.
- Press Edit account to change it, or the delete button to remove it.
Good to know
- Expand all and Collapse all open and close the tree. Search to find an account.
- Print COA prints the whole chart.
- Groups opens the top-level account groups.
- An account that already has entries should be made inactive rather than deleted.
- Each bank account needs its own account in the chart, and system accounts are linked to accounts here.
Related
More in Set up
Set up Accounts & FinanceThe order to set up your accounts once - fiscal year, chart of accounts, banks and system accounts - so every receipt and voucher posts correctly.Add and open a fiscal yearAdd your financial year with its start and end dates, open it for posting, and close it when the year is done.Add your bank accountsAdd each bank account your society uses and link it to its account in the chart, so bank receipts and payments post to the right place.Link system accountsTell the software which account each automatic posting uses - cash, income, member receivable, commission, refund fee and more.
Ready to try it? Open Accounts & Finance